把DeepSeek部署到到WPS上,实现AI赋能 时间: 2025-11-22 21:43 分类: 猿码 热度: 274°C 评论 在之前的教程中,我们说了怎么在本地部署DeepSeek以及如何给本地部署的DeepSeek投喂数据。对这类内容感兴趣的小伙伴看过来。 ###传送门: **[【教程】本地部署 DeepSeek](https://blog.gaomeluo.com/archives/bushuDeepSeek/ "【教程】本地部署 DeepSeek") [【教程】怎么在Mac(以及iPhone)本地跑DeepSeek R1?](https://blog.gaomeluo.com/archives/bushuDeepSeek-mac/ "【教程】怎么在Mac(以及iPhone)本地跑DeepSeek R1?") [如何给本地部署的DeepSeek投喂数据?](https://blog.gaomeluo.com/archives/touweiDeepSeek/ "如何给本地部署的DeepSeek投喂数据?")** 下面我来讲一讲如何把DeepSeek部署到到WPS上,实现AI赋能。 ###一、API-KEY 介绍 ####1、一般使用语言模型都是一个直接可用的聊天界面,而 API Key 允许开发者将 GPT 模型集成到自己的应用、网站或服务中,比如: 1)智能客服系统 2)自动化办公工具 3)AI 生成内容(如文章、代码) 一些依赖大模型的工具,如“沉浸式翻译” 相关阅读:只需一键,翻译从繁琐到简单,AI翻译沉浸式体验竟能如此轻松! ####2、API Key(应用程序编程接口密钥)是一串独特的密钥,用于验证用户或应用程序对某个API(应用程序接口)的访问权限。它类似于用户名和密码的组合,确保只有授权用户或应用程序才能使用特定的API服务。 1)获取 API Key 后,开发者可以在代码或应用中使用它来向 OpenAI或DeepSeek 的服务器发送请求,让 AI 生成文本、回答问题或执行其他任务。 2)对于类GPT的大语言模型,在程序上调用,一般要配置有3个参数:API-KEY、接口地址(BASE_URL)、模型名称。 ###二、申请API-KEY,通过接口使用DeepSeek服务 ####1、通过DeepSeek官方网站申请DeepSeek的API-KEY: 1)打开DeepSeek官网:https://platform.deepseek.com/api_keys 在开放平台页面,左侧点击“API keys”,右边点击“创建API key” 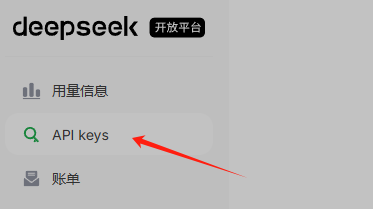 2)输入名称 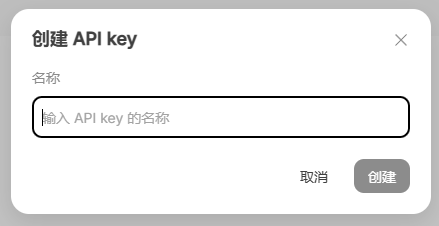 3)点击“创建”,可以看到生成的key,这个是在程序中使用的,不要泄漏(他的作用类似于给程序使用的密码) ####2、deepseek太过火爆,如果官网难申请,可在硅基流动申请 API KEY(备选方案) 打开“硅基流动”官网:https://iil.ink/siliconflow 自行申请 API KEY。 ###三、通过 WPS 官方内置功能接入 ####1、升级 WPS: 将 WPS 升级至 2025 新春版(12.8.0 及以上)。 ####2、打开WPS功能入口: 在文字 / 表格文档界面右上角点击「智能助手」图标,或使用快捷键 Ctrl+J 调出 AI 侧边栏。 ####3、账户绑定: 首次使用需登录 WPS 账号,然后完成 DeepSeek API 密钥绑定。密钥获取路径为:DeepSeek 官网 > 开发者中心 > 创建 API Key。 ####4、使用功能: 点击「审阅」>「AI 校对」,可以实现语法纠错与润色。 ###四、不登录WPS或者使用老版的WPS,通过 OfficeAI 插件接入(仅支持 Windows 系统)AI大模型。 ####1、下载并安装 OfficeAI 插件: 访问 OfficeAI 插件下载地址https://www.office-ai.cn/ ,下载插件。 下载完成后,双击安装文件,按照提示完成安装。 ####2、获取 DeepSeek 的 API Key: 1)打开 DeepSeek 官网https://www.deepseek.com/, 2)点击右上角的 “API 开放平台”,登录账号(如果没有账号,先注册一个)。 3)登录成功后,点击左侧的 “API Keys”,然后点击 “创建 API Key”,输入一个名称,创建完成后复制生成的 API Key。 ####3、配置 OfficeAI 插件: 1)OfficeAI 插件安装完成后,打开 WPS,此时在 WPS 界面中会多出一个 “OfficeAI” 的选项卡。  2)点击 “OfficeAI” 选项卡,再点击 “设置”。  3)在 “设置” 窗口中,选择 “大模型设置”,打开 “本地部署” 开关,选择 “ApiKey” 标签。 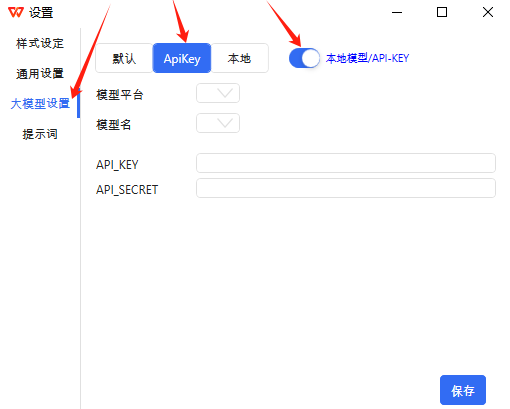 4)在【大模型设置】右侧的【模型平台】 下拉菜单中,选择 DeepSeekR1(Deepseek官网)或者硅基流动(支持DeepSeekR1)。 【模型名】:deepseek-chat 【API_KEY】 输入框中填入你自己申请的 DeepSeek API Key。 点击 “保存” 按钮。 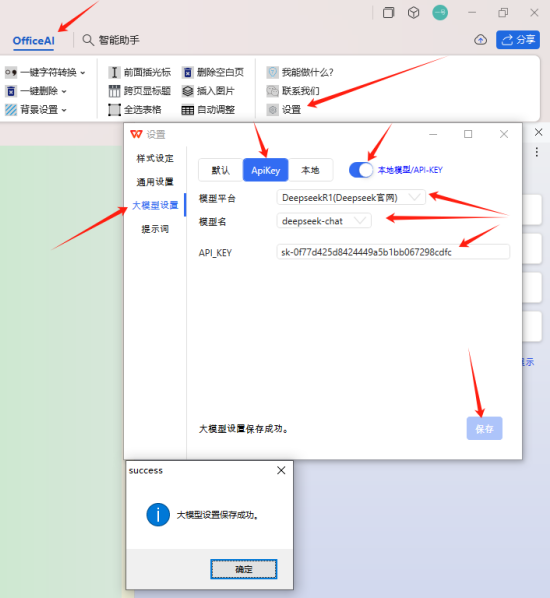 ####4、使用 DeepSeek 功能: 配置完成后,点击 WPS 界面中的 “OfficeAI” 选项卡,即可使用 DeepSeek 的各种功能,如 AI 校对、文案生成、润色、翻译等。 ###五、通过 VBA 代码手动集成DeepSeek 或者使用 WPS 自带的 JS 宏实现接入 DeepSeek 接口。 ####1、启用开发工具: 打开 WPS,新建一个文档。点击 “文件”→“选项”→“自定义功能区”,勾选 “工具” 选项,点击 “确定”。  ####2、配置信任中心: 点击 “文件”→“选项”→“信任中心”→“信任中心设置”→“宏安全性”,将安全性设置为 “低”,以便运行 VBA 宏。 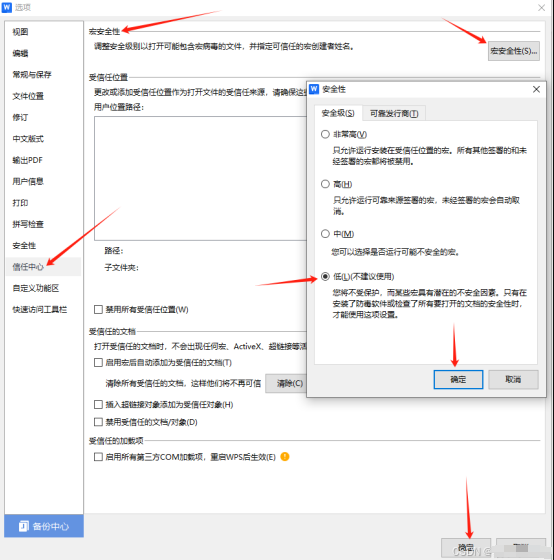 ####3、添加模块: 1)点击 “工具”→“开发工具”,点击 “VB 编辑器”。或者【切换开发环境】,点击【WPS宏编辑器】 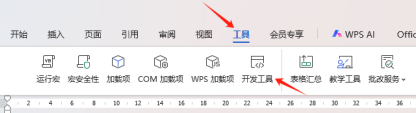  2)在新窗口中点击 “插入”→“模块”,将代码复制到编辑区中,并替换其中的 api_key 为你的 DeepSeek API Key。 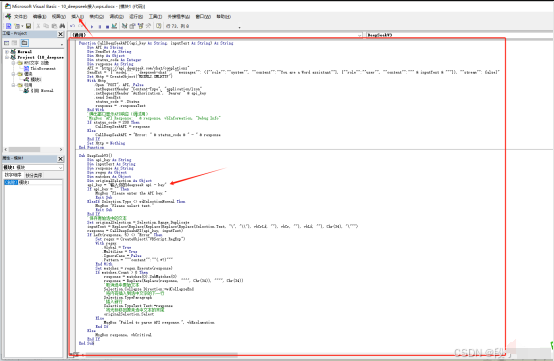 3)示例代码一 VBA 代码: 可用于在 WPS 的 Word 文档中调用 DeepSeek API 对选中文本进行处理,并将结果插入到文档中。 Function CallDeepSeekAPI(api_key As String, inputText As String) As String Dim API As String Dim SendTxt As String Dim Http As Object Dim status_code As Integer Dim response As String API = "https://api.deepseek.com/chat/completions" SendTxt = "{""model"": ""deepseek-chat"", ""messages"": ({""role"":""system"", ""content"":""You are a Word assistant""}, {""role"":""user"", ""content"":""" & inputText & """}), ""stream"": false}" Set Http = CreateObject("MSXML2.XMLHTTP") With Http .Open "POST", API, False .setRequestHeader "Content-Type", "application/json" .setRequestHeader "Authorization", "Bearer " & api_key .send SendTxt status_code =.Status response =.responseText End With '弹出窗口显示API响应(调试用) 'MsgBox "API Response: " & response, vbInformation, "Debug Info" If status_code = 200 Then CallDeepSeekAPI = response Else CallDeepSeekAPI = "Error: " & status_code & " - " & response End If Set Http = Nothing End Function Sub DeepSeekV3() Dim api_key As String Dim inputText As String Dim response As String Dim regex As Object Dim matches As Object Dim originalSelection As Object api_key = "输入你的deepseek api - key" If api_key = "" Then MsgBox "Please enter the API key." Exit Sub ElseIf Selection.Type <> wdSelectionNormal Then MsgBox "Please select text." Exit Sub End If '保存原始选中的文本 Set originalSelection = Selection.Range.Duplicate inputText = Replace(Replace(Replace(Replace(Replace(Selection.Text, "\", "\\"), vbCrLf, ""), vbCr, ""), vbLf, ""), Chr(34), "\""") response = CallDeepSeekAPI(api_key, inputText) If Left(response, 5) <> "Error" Then Set regex = CreateObject("VBScript.RegExp") With regex .Global = True .MultiLine = True .IgnoreCase = False .Pattern = """content"":""(.*?)""" End With Set matches = regex.Execute(response) If matches.Count > 0 Then response = matches(0).SubMatches(0) response = Replace(Replace(response, """", Chr(34)), """", Chr(34)) '取消选中原始文本 Selection.Collapse Direction:=wdCollapseEnd '将内容插入到选中文字的下一行 Selection.TypeParagraph '插入新行 Selection.TypeText Text:=response '将光标移回原来选中文本的末尾 originalSelection.Select Else MsgBox "Failed to parse API response.", vbExclamation End If Else MsgBox response, vbCritical End If End Sub 4)示例代码二: 使用 WPS 自带的 JS 宏实现接入 DeepSeek 接口,主要功能是对选中文本进行润色或续写。 /** * 使用DeepSeek API对WPS文档中的选中文本进行润色或续写 */ function DeepSeekPolish() { Console.log("开始调用接口DeepSeekPolish"); // 获取选中的文本 let selectedText = Application.Selection.Text; if (!selectedText || selectedText.trim() === "") { alert("请选择需要润色或续写的文本!"); return; } // 替换特殊字符以适应JSON格式 selectedText = selectedText.replace(/\\/g, "\\\\").replace(/\n/g, "\\n").replace(/"/g, "\\\""); // DeepSeek API密钥(请替换为你的API密钥) let apiKey = "改成自己的密钥"; let url = "https://api.deepseek.com/chat/completions"; // 构造请求数据 let data = { model: "deepseek-chat", messages: ( { role: "user", content: selectedText }, { role: "assistant", content: "请润色或续写以上内容" } ), temperature: 0.7 }; // 发送POST请求 let xhr = new XMLHttpRequest(); xhr.open("POST", url, false); xhr.setRequestHeader("Content-Type", "application/json"); xhr.setRequestHeader("Authorization", "Bearer " + apiKey); xhr.send(JSON.stringify(data)); // 处理响应 try { if (xhr.status === 200) { let response = JSON.parse(xhr.responseText); let result = response.choices(0).message.content; result = result.replace(/\\n/g, "\n"); // 恢复换行符 //移动光标到选取末尾,另起一行 Application.Selection.MoveEnd; Application.Selection.TypeParagraph; Application.Selection.TypeBackspace; // 将结果插入到文档中 Application.Selection.Text = result; alert("润色或续写完成!"); } else { alert("请求失败:" + xhr.statusText + "\n响应内容:" + xhr.responseText); } } catch (error) { Console.log("错误信息" + error.message) } } ####4、自定义功能区: 1)回到 WPS 主界面,点击 “文件”→“选项”→“自定义功能区”。 2)在右侧功能区列表中,点击 “新建组”,将其命名为 “DeepSeek”。 3)在左侧命令列表中,选择 “宏”,找到刚刚添加的宏(如 “DeepSeekV3”),点击 “添加”,然后右键重命名为 “生成”,点击 “确定”。 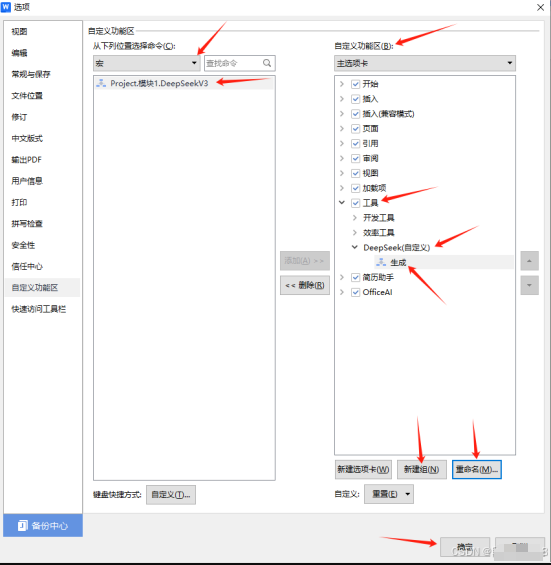 ####5、使用 DeepSeek 功能: 打开 WPS 文档,选中需要处理的文字,点击 “生成” 按钮,DeepSeek 会返回处理结果,并直接插入到文档中。 ####6、说明:DeepSeek 所有的模型和对应的费用 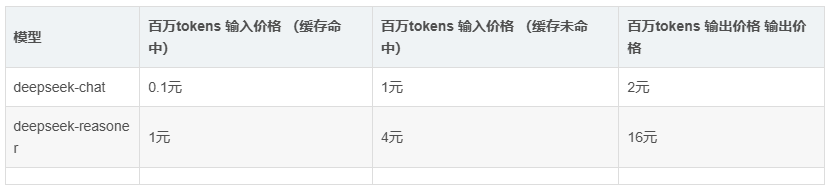 deepseek-chat 模型为 DeepSeek-V3; deepseek-reasoner 模型为 DeepSeek-R1。 标签: AI智能

评论已关闭